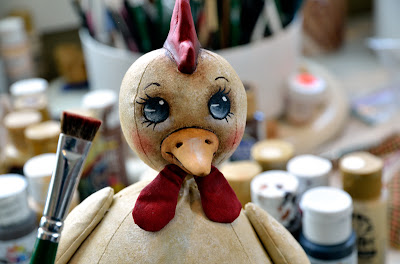
Here you see that I have added a float of white in each eye walking it up futher into the eye. I also added some white highlight dots and a reflection line.
She now has eyebrows, eyelashes and a float of burn umber around the upper eye area to make them pop. I added a float of white under each eye. I swirled on some cheek color with a dry brush like you see in the picture. She is relieved to have a face now!
I added a line of burnt umber with a liner brush between the feathers. I finished that off with a float of burnt umber as well.
I added some shading around the upper thigh where the leg meets the body. It isn't showing up too well I see in this picture.
I added a coating of antiquing gel to the feet and wiped it back lightly with a piece of t-shirt material.
Here is a picture of the antiquing gel I use, the sealer I spray the finished chicken with and the mod podge I use as a final cover to the wire chicken feet.
I decided at this point that I wanted to have a speckled chicken. This can be done with a spatter tool like you see in the picture or a toothbrush. The paint needs to be thinned down a bit with water first. With my tool I coat the brush in paint and there is a metal piece you don't see in the picture that when I twist the wood handle it goes against the bristles. Just use a knife of paint spatula like you see in the picture and a toothbrush if you do not own a tool like this one.
It appears that I have thrown this chicken in the garbage can...... well yes I have actually! I stuck her in there so when I speckle her all up the floor and me does not get speckled with her.
Can you see all her speckles? I did this with Burnt Umber. What would I do without that color? I am not sure....
Here is the sideview, you can see all her speckles a bit better in this picture. I know all these details are a lot of fussing, but it is this kind of attention to detail that really does make a difference in your finished artwork!
This is the end of Part 4. Part 5 will focus on finishing her up and making her bucket of eggs! I also took more photos while I made another pair of wire feet. This time I show the steps of bending the wire into the foot shape. I will add this onto the last tutorial.
Thanks for stopping by!


She is looking so good.
ReplyDeleteGreat tutorial, Jody! I just love Henrietta! How nice to be able to refer back to your tutorials while working with the pattern for her.
ReplyDeletehugs!